Showing posts with label Home. Show all posts

Tuesday, October 28, 2014

Using Old Windows

Transformation Tuesday - Post #6


Happy Tuesday!  Hope you're having a great day! 

Today I thought I'd talk about something near and dear to my heart... old windows.  They can be found in just about every room of our house!  I love them as stand alone wall décor, perched as a backdrop, used as a coat rack, a chalkboard.... and the list goes on and on!  Any "new" old window always has a home in this house! 

A few other great things about old windows....
1.  They come in all sizes.
2.  They are easy to come by in antique stores, flea markets, and yard sales.
3.  And best of all, they are easy on the wallet!  Affordable decorating! (Your husband can thank me now!) 

Here are some of the ways that I've transformed an old window and they can be seen in our house!

This one has a home in our foyer perched atop the cedar armoire.  It's a beautiful backdrop to all the other "goodies" up here.


This one you'll find hanging over the bed in our master bedroom.  It's dressed with just a simple "twiggy" wreath and a burlap bow.


Another one hangs in the laundry room.  I added a few small hooks (found at Lowe's) and another "twiggy" wreath.  Can you see a trend with the wreaths?!  I love the contrast of the natural tone of the wreath with the white window!


And this one (which happens to be my favorite) can be found hanging over the dresser (another DIY transformation) in our guest room.  I hung it horizontally, adding a shabby chic shelf, coat hooks, and a mirror.  Let me show you how I did that.....


This window I found at an antique store some time back for $5.  Of course it needed a good cleaning which also meant removing flaking paint.  (It's pretty evident that I should have used a drop cloth here but oh well....)


I started with a couple of shelf brackets that I purchased at Lowe's (around $3 ea) and a 1x8 board cut to fit across the top (or side, whichever way you want to look at it).  I  had the board in my scrap pile but it too can be purchased at Lowe's and they will cut it for you. (There are four brackets in these pictures and you'll see how I used the other two as you read on....)

 
I stained the brackets and shelf with Minwax in Provincial.  Once they were dry, I added a light coat of white ceiling paint not covering them completely. 


Next, I added some "G ring" picture hangers to the back of my window.  Added the coat hooks and then attached the shelf brackets using a couple of screws and the inset hanger found on the back of the bracket.  I then secured the shelf across the top using wood screws.


 And that's it!  A very simple and easy project but what an impact!


And here is how I used the other two brackets.....  This one I haven't hung yet but it will have a home real soon!


Here are a few other ideas from Pinterest for using old windows....


(What a great idea for a window missing the glass!)


 Hopefully you've found some inspiration to hang (or prop) a few old windows around your house.  I'd love to hear or see how you've used them!  Take care and have a great rest of the week!. 

P.S.  Next week I hope to start sharing some Christmas ideas with you!  It'll be here before you know it!


Tuesday, October 21, 2014

Faux Pallet Gate

Transformation Tuesday - Post #5


Today I thought I'd share an easy peasy tutorial with you.  I gave you a sneak peak of it last week when I shared my cabinet door turned coat rack.  Which by the way, I'm still loving!  (And you'll see in some of the pictures that I've been decorating that little spot in our foyer.)

Using a few pallet boards I built this awesome faux gate that now hangs in what was a huge empty wall in our foyer.  I am so happy with it!  It makes such a statement when you walk in the front door and is a great compliment to the coat rack!  AND it only cost $12 to build!


Now, let's talk about just how easy this really is to do!

Step 1.  Cutting up the pallets.  I started with a couple of pallets just like this one.  Broke out the sawzall and began taking them apart.  The sawzall cut right through the nails on the ends but I had to use a nail pry bar and hammer to remove the nails from the middle section.  And of course some of the boards split when prying/beating on them.  Oh well.... what is a girl suppose to do but tear apart another one.  It took a couple of pallets to get enough "good" wood to create the faux gate but it happened.

This is the step that took the longest.  And it was definitely a workout!  But "Girl Power" prevailed and got the job done!


Step 2. Attaching the boards.   I laid out my boards in the pattern that I wanted and dry fitted so to speak my horizontal boards across the top and bottom before measuring and cutting them.  All pallet boards are not created equal so it's important to measure both top and bottom.  I used a nail gun to attach the horizontal boards across the top before turning the gate over and using wood screws to make sure everything was good and secure.


Step 3:  Paint.  I used slightly watered down ceiling paint and dry brushed the middle of each board.  I love ceiling paint because of it's great coverage!  This took all of 15 minutes at most. 

 
 Step 4.  Add hardware.  I added two 5 1/2" hinges that I purchased at Lowe's to the horizontal boards.  I looked for some old hinges at a few local antique stores but couldn't find any...  Oh well, these work just fine and they were only $6 each.  I guess I could have tried to make these look at little aged by spray painting and sanding them but it really isn't that big of a deal to me.  I may do it later but I doubt it.  I then added two large D ring picture hangers to the back.


Step 5.  Hang and Enjoy!  I used two heavy duty wall anchors to secure it to the wall (because of course there weren't studs where I wanted it).  It's pretty heavy! 


 And that's it..... Easy Peasy!  For now, I added a fall wreath but I have lots of ideas in my head about how to decorate it from season to season, especially as Christmas quickly approaches.  By the way, I've been working on a ton of Christmas projects and I'm excited about sharing some of them in the next few months!

Hope you're having a great day!  Take care and thanks for stopping by!

Sunday, October 5, 2014

Our Fall Home

Hello friends!  Thanks for hanging out with me today!

I have a bit of a confession.  I've been hesitant about posting this little fall home tour.  I started to look around and worry that our house wouldn't be grand enough in comparison to a lot of the beautiful houses out there in blogger land.  However, our house is our home.  It is real, lived in, and comfortable....nothing staged or spectacular and it is ALWAYS (and I do stress ALWAYS) a work in progress!  After thinking about it further, I decided to treat you all like the friends that you are and show you what you would see if you came over to our house this fall.  Hopefully you are able to get a couple of ideas for your home or at least enjoy the tour!

Ok....enough about that, let's get started! Come right in!

  
(You can see some of our fall outdoors here.)

I really didn't get into adding a lot of the seasonal oranges, reds, and yellows to the interior this year.  I struggle a little with that from year to year.....seasonal or neutral?  seasonal or neutral? Well, this year neutral won out!  I would also say, for the most part, I kept the decorating pretty simple .... shopping our house (and attic), adding a few things here and there like mums and greenery (from our yard), and transforming some of the traditional orange and green (aka pumpkins) that I already had.   You can see how I transformed the pumpkins here

This is our small foyer. 


The cedar armoire is a family heirloom and this is how it looks day to day other than the little white pumpkin.
 
This is what you'll see entering our front door and taking just a few short steps through the foyer.  We have an open floor plan with combined living, dining, and kitchen.   I added a few touches of fall throughout these spaces so let's keep going to see them in detail.....


This is the focal point of the room because it is right under the tv.  I switch it up quite often. I shopped our house to find this ice bucket for the mum, a mirror from the guest room, added a few white pumpkins, and this small chalkboard that gets moved from room to room and used season to season.
 
 
A few fall magazines are scattered throughout. (I'm a Southern Living and BHG hoarder!  I just can't seem to make myself throw them out!)


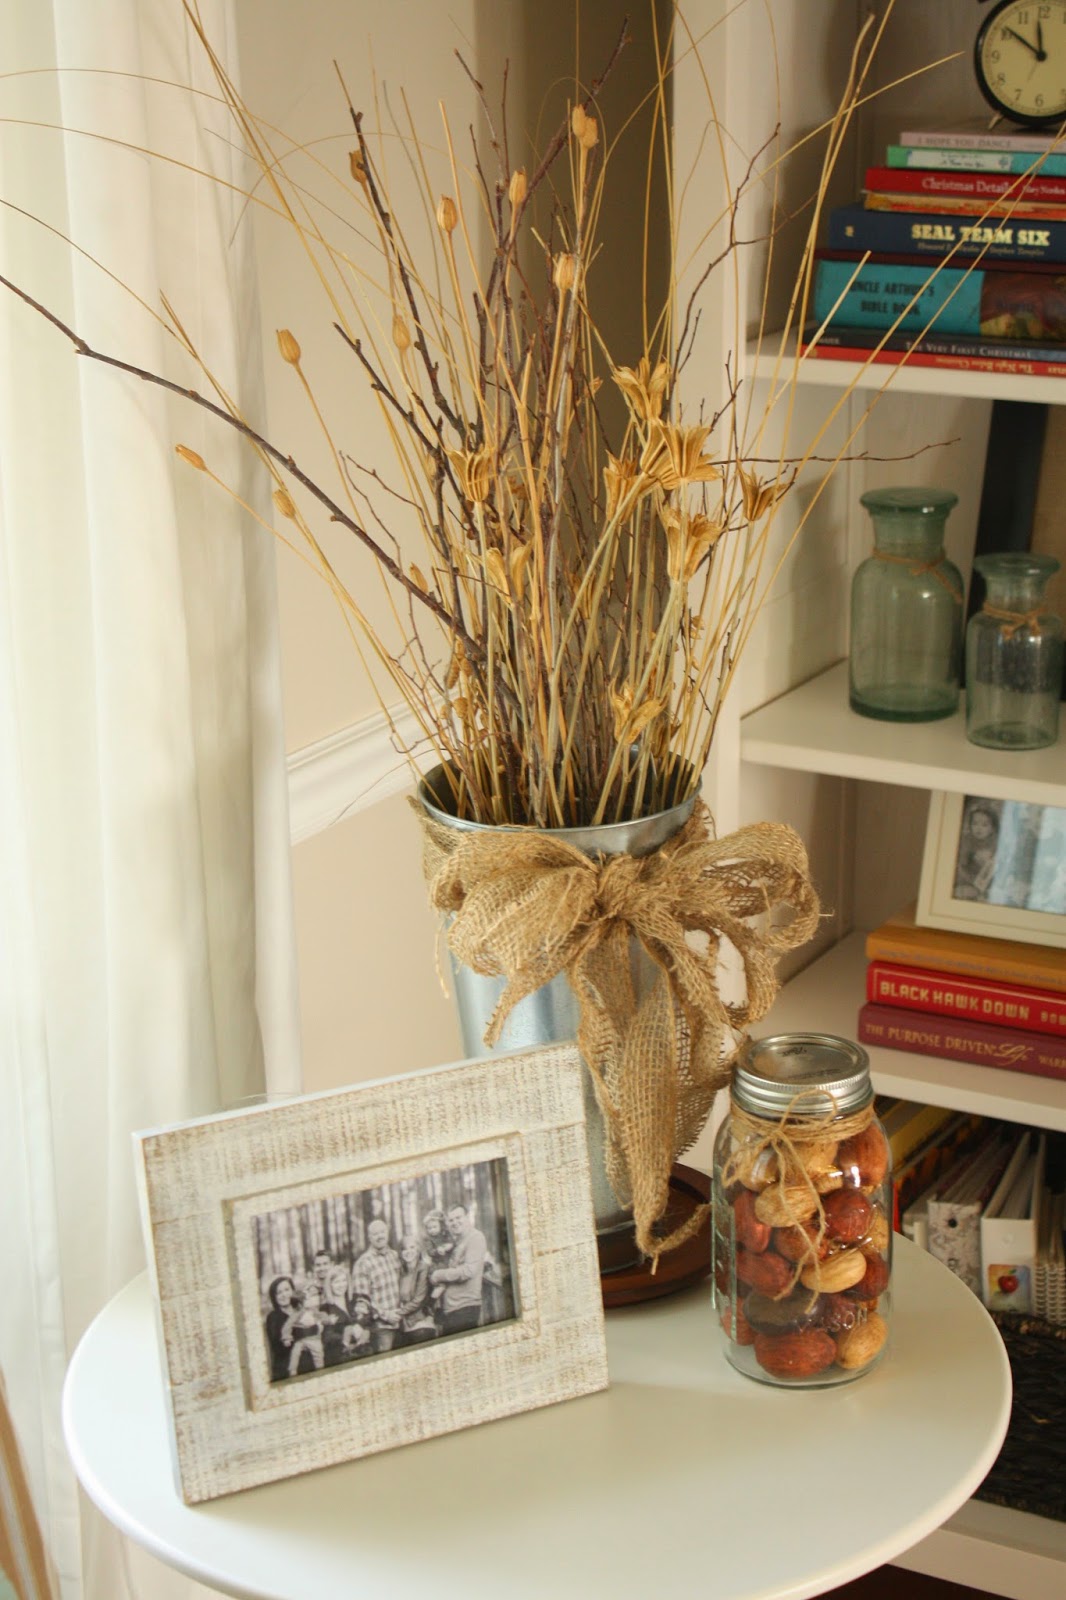
A galvanized container with a few sticks and dried flowers adds a touch of fall to this table, as well as a mason jar filled with faux acorns and nuts.  I use mason jars for everything!  Have you noticed!
 
 
You'll find trays pretty much on every surface in our house.  I love them!  It's one of the things that I'm always on the hunt for at antique and thrift stores.  Not only are they great for layering but they can quickly be moved which in this case works quite well.  The coffee table also happens to be the toy box!  The roses are from the backyard and the little leaf candle holder I've had for years....


This little table sits beside the back door.  More greenery, another pumpkin, and a few more magazines...  Can you see a trend yet?


This mum makes a statement in the kitchen and is the perfect addition to the DIY island.  The galvanized container is actually the base for a stand drink dispenser. 


The dining table also got dressed for fall.  I adore white plates... they are so versatile and work from season to season.  I found the butcher block at an antique store several years ago and have cherished it since.  It's the perfect size and again, is easily picked up and moved when company is coming.  There's also more pumpkins, greenery, candlesticks.  The little turkey I found at target several years ago and he makes an appearance every year. 


I dug out the DIY burlap banner from last year. And nothing says fall like apples...especially when they are on a leaf shaped platter! 
 
Now we'll exit the back door and take a little look around the screen porch.


The screen porch also got a few updates for fall.  I typically change out the bedding from season to season along with the pillows. The table here is set  with my husband's grandmother's china.  You'll also find some fall magazines, candles, and more pumpkins. 


And that's it.... other than this beautiful wreath hanging on the back door!  This was an antique store find.  I glammed it up a bit with the burlap bow and the initial.  
 
I hope you enjoyed your visit!  Thanks for spending time with me and please stop by anytime!