Showing posts with label Tutorials. Show all posts

Monday, January 26, 2015

Key To My Heart Sign

Wow!  It's already January 26, 2015!  I don't care what they say...time does fly!  Again, I've taken a little hiatus from the blog.  I could give you many excuses but keeping it real, I just haven't made it a priority.  I've really been struggling personally to get motivated since the holidays and into 2015.  Not quite sure why... but hopefully, I will get back in the grove soon.


Today I'm sharing this easy little Valentine's DIY that's also perfect for all year round.  I usually don't decorate for Valentine's Day but this year I've added a few touches here and there and I'm loving this sign mixed in.  I have it displayed on the upcycled dresser under the tv in our living area.  It's super cute and it just may stay there long past Valentine's Day.


Here's how it all came together.  I cut three 1x3"s at 7" and joined them together using a 7" piece of wood and screws across the back.  (I used scrap pieces I had on hand but a solid piece of wood would work too.)  After a quick sanding, I stained it with Minwax Special Dark Walnut and let it dry.


I traced on a heart shape and filled it in with a couple coats of white ceiling paint.


After letting it dry again, I quickly sanded over the entire piece distressing the edges and the heart.  I used a black sharpie to write "love" in the right hand corner.  I then waxed over it to seal the paint and stain.  I tied the cute little silver key (found at Michael's for $1.50)  to jute string and attached it to the top using a carpenter tack.  Total cost =$1.50.  How awesome is that!


I love how simple and easy this was!  It also speaks to my heart.  I am a true romantic and I love incorporating special pieces like this little sign into our décor.  It not only symbolizes the love I have for my truly amazing husband (who will forever hold the key to my heart) but all the special people in my life like family and friends! 

Are you decorating for Valentine's Day?  I would love to hear from you...comments or questions are always welcome!

See you soon!

Jody


Tuesday, December 9, 2014

Yardstick Stars

Transformation Tuesday - Post #10


Are you ready for one of the easiest DIYs ever?!  You won't believe it! 

What I love about these are that they are so easy, inexpensive, make a huge statement, look great for Christmas, and can be used after the holidays!
 
Here's what you'll need.
 
10 yardsticks (or less if you're only making one or two.  Found at Lowe's for $.69)
Stain (any color)
White paint (any kind)
1/2" bolts with nuts (Bought at Wal-mart for $.96/pkg 10)
drill
 
1.  Cut yardsticks to desired length.  You'll need 5 yardstick pieces for each star.  (I cut five yardsticks to 20" leaving me with five 16" pieces.  I left the other five yardsticks at 36".)
2.  Stain yardsticks.
3.  Optional:  Let the stain dry and white wash yardsticks.  (They also look great just stained.)
4.  Lay out yardsticks in desired star pattern. 
5.  Drill small hole and insert bolt at each end joint.  Keep it loose until all are attached.  Form star and tighten the bolts to hold in place.


All three cost less than $10 and only took a few hours to make including drying time.  I've seen them at several of the local antique stores and recently at the Southern Christmas show in Charlotte made out of tomato stakes with some going for the upwards of $20.  Wow!  Hopefully I've shared some DIY inspiration and saved you some money as well!

Thanks for visiting!  Hoping to get several more posts in before the holidays so keep checking in or subscribe to get the latest post right to your email!  See you soon!

Jody


Tuesday, December 2, 2014

DIY Stocking

Transformation Tuesday - Post #9

Hi there!  I hope you all had an amazing Thanksgiving!  I certainly did!  I took a little break from blogging and projects to cook and spend time with family and friends.  And of course, I ate entirely too much!

It's beginning to look a lot like Christmas around our house!  This little elf has been extremely busy decorating, crafting, shopping, and wrapping.  I love Christmas and I look forward to decorating every year.  This year I'm trying to keep it neutral and simple to avoid that cluttered feeling.  I hope to post a mini Christmas house tour soon.  I have just a few more things to finish up.

Keeping with my neutral décor, I decided to make a new stocking for my youngest son.  His from previous years was burgundy and that just wasn't going to work.  I've made several stockings in the past but remembered them being somewhat challenging so when I searched Pinterest for a tutorial, I was looking for one that was simple and easy to follow.  After reading through several, I decided on this one from http://www.diaryofaquilter.com/2010/12/easy-stocking-tutorial-today.html


I modified the stocking size using this pattern from Positively Splendid.  I also added an additional five inches to the top as my cuff. 


I used a heavy cotton muslin for the outside body and black ticking stripe for the lining/cuff. 


I sewed the outside to the lining as per the tutorial.  This tutorial is so simple and easy to follow. 


I turned my stocking right side out, turned down the cuff, and added a 6" piece of cotton ribbon for the hanger.


It was that simple. Bonus....it only took about 30 minutes from beginning to end!  It looks great hanging from my cabinet door coat hanger.  You can find that tutorial here.


Think of the numerous possibilities and how many stockings you can sew up in just a few hours!  I also love the mini stocking idea as gift card holders, Christmas ornaments, small gift packaging, etc.

I hope you all have a happy and blessed Tuesday!  Thanks for stopping by!  Look for more holiday posts coming soon!

Jody


Tuesday, November 18, 2014

Faux Mercury Glass

Transformation Tuesday - Post #8


First up.... let me just say I am so sorry if you were looking for a Transformation Tuesday post last week.  I promise you... I have a great reason!  Mr. LAHWJ hurt his back while working in Afghanistan and came home unexpectedly last Wednesday.  It put quite a kink in my plans for last week so I had to squeeze a lot into Monday and Tuesday.  Thankfully, he's doing okay (and I am so happy that he's home) but I see a lot of doctor visits in our near future!  I am also playing chauffeur.... Oh, but just wait until he gets my bill for chauffeur services.  Lol!
 
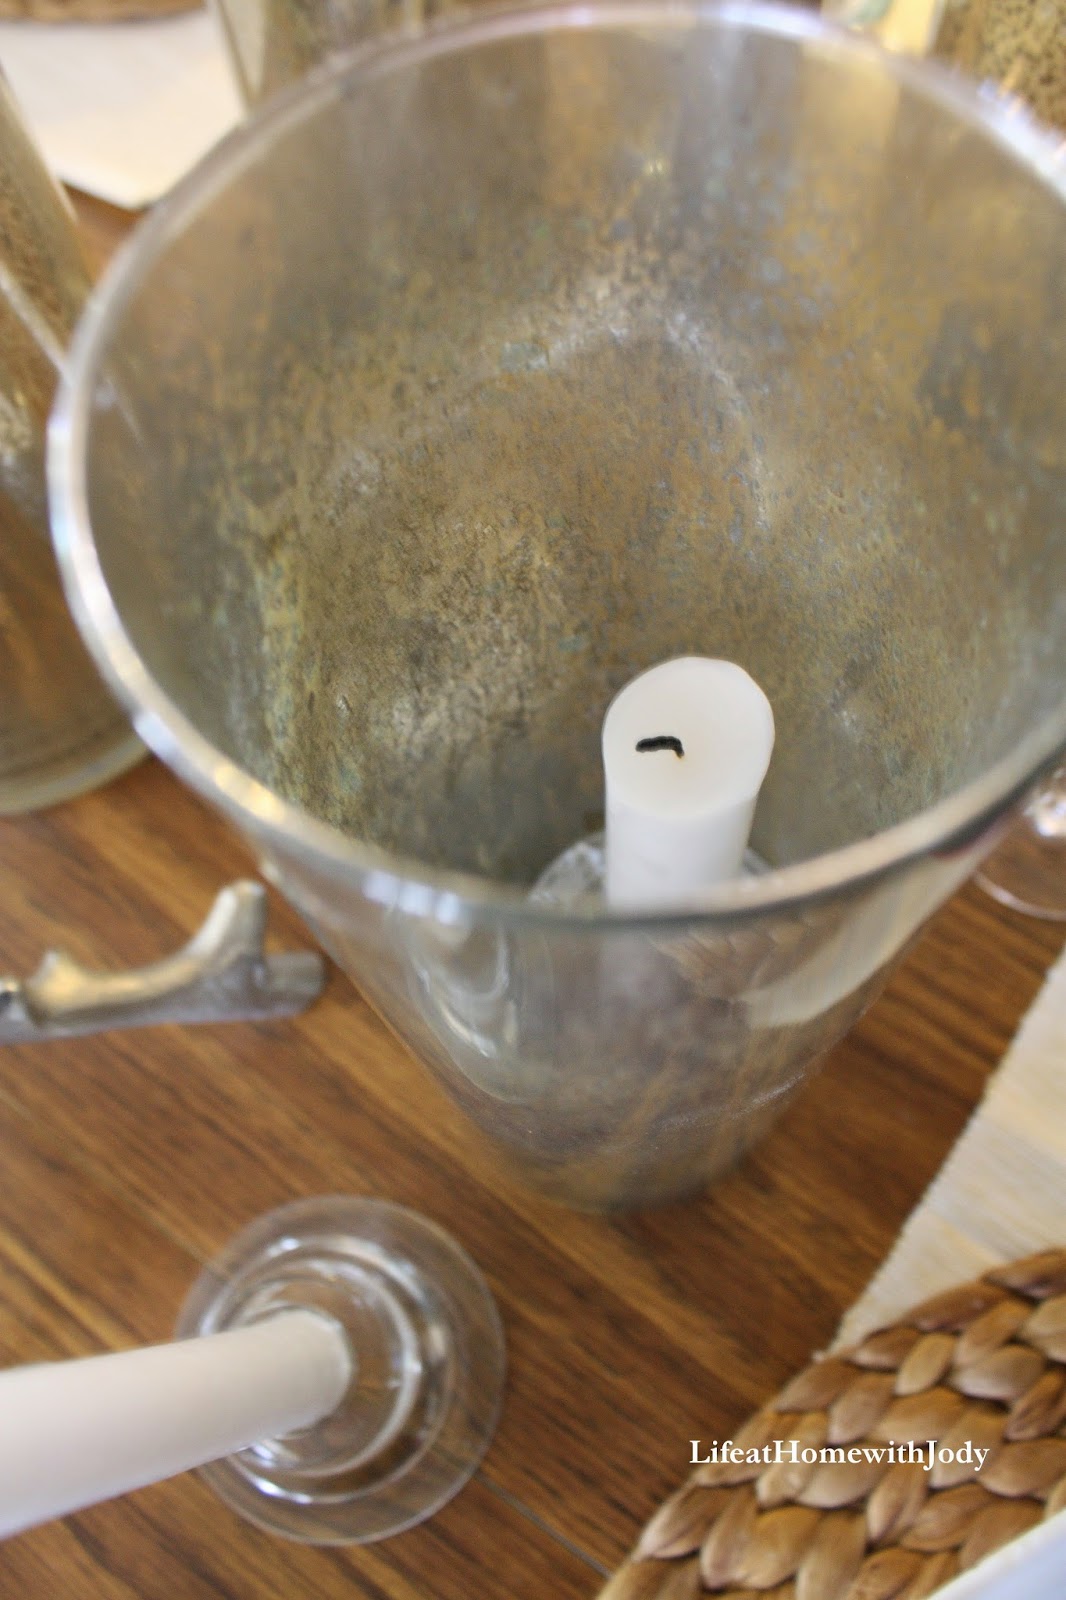
I love mercury glass and if you've been in Homegoods, TJ Maxx, or Marshal's lately you'll find tons of mercury glass vases, candleholders, etc. lining their shelves for the holidays.  Most also come with a hefty price tag!  This week I thought I'd share a quick and easy tutorial showing how to create your own faux mercury glass. 
 
Here are the supplies that you'll need:
 
Painter's tape
Mirror Image (Rustoleum) or Looking Glass (Krylon) spray paint
Gold Metallic spray paint
Glass Vases, Candleholders, etc
Spray bottle (mixture of 1/2 water and1/2 vinegar)
Paper towels (or rag)
Scrap paper

  
Step 1:  Make sure your vases, candleholders, containers are clean.  I had several of these stashed in the attic and a few I picked up at the dollar store.

 
Step 2:  Tape off the outside of the container using painters tape and scrap paper. (The Mr. complains that I save everything but sometimes it pays off.)

 
Step 3:  Spray the inside of the container with the water/vinegar mixture. 
 
Step 4:  Spray a few quick light squirts of the mirror image paint all around the inside of the container.  Pour off any extra water using the paper towels or rag.

 
Step 5:  Allow to dry a minute or two and repeat steps 3 and 4 until you reach the desired effect.  I sprayed these vases, etc. with three coats.  I didn't want the glass to be completely covered.  I really like just a hint of the mirror image.

 
Step 6:  Finally, spray the container with the water/vinegar mixture and a few light squirts of the gold paint.  This will leave just a slight hint of the gold.  If you prefer more of a gold look, spray a few coats of the gold paint before using the mirror image spray.

 
Step7:  Allow to dry completely.  Remove the tape and paper. 
 
All done!


 I love the mix of silver and gold.  The gold is very muted and adds a nice touch to the primarily silvery Christmas thing I've got going on. 
 
I added several of them with a mixture of other candleholders to our dining table as a centerpiece.  They are beautiful lit up at night!  I love the mix of the silver antler candleholders, the large mercury glass cylinders, small votive holders, and glass tapered candle holders. 


I will also share with you a little strategy that I use to keep from buying those expensive tall candles.  I turn a small candle holder upside down inside the larger cylinder and use a smaller candle.  It's the perfect height.   I also used tapered candles inside a few of the cylinders.  You could also fill the cylinders with Epsom salt. 


And here's one more picture of the faux mercury glass pieces being used as a vase.  I love how it looks next to the mercury glass lamp on our nightstand. 


It's perfection in my book and I love the money I saved doing it myself! 
 
Happy Tuesday!
 
Jody