From Cabinet Door to Coat Rack
Transformation Tuesday - Post #4

Hello Everyone! How's things in your world? Mine you ask ...chaotic, hectic, but good! I am feeling very blessed these days!
I did manage to finish up a few projects last week (even in my world of chaos) and one of those I'll be sharing with you today! I bought this cabinet door at one of the local antique stores for $5.00. It's definitely not an "antique" (or even old) but for this project we'll pretend that it is!

The first step in this transformation was to clean it up really good (it was kinda yucky!) with some good ole' Mean Green cleaner and a rag! Once it was dry, I used Elmer's stainable/paintable wood filler to fill in the hole where the handle use to be. After it dried (which doesn't take long), I sanded the entire door with 120 grit sand paper using my hand sander. You certainly can sand it by hand. The goal is just to knock off some of the shine.

I then painted it with Valspar Birchwood White. (Wow, no spray paint!) I did mix a little chalk paint powder in with my paint so it would have the texture and smooth finish of chalk paint. Chalk paint also works great on unprimed surfaces. It took two coats.
After the paint dried, I distressed it using more 120 grit sand paper, wiped it down good, and waxed it with a clear wax.


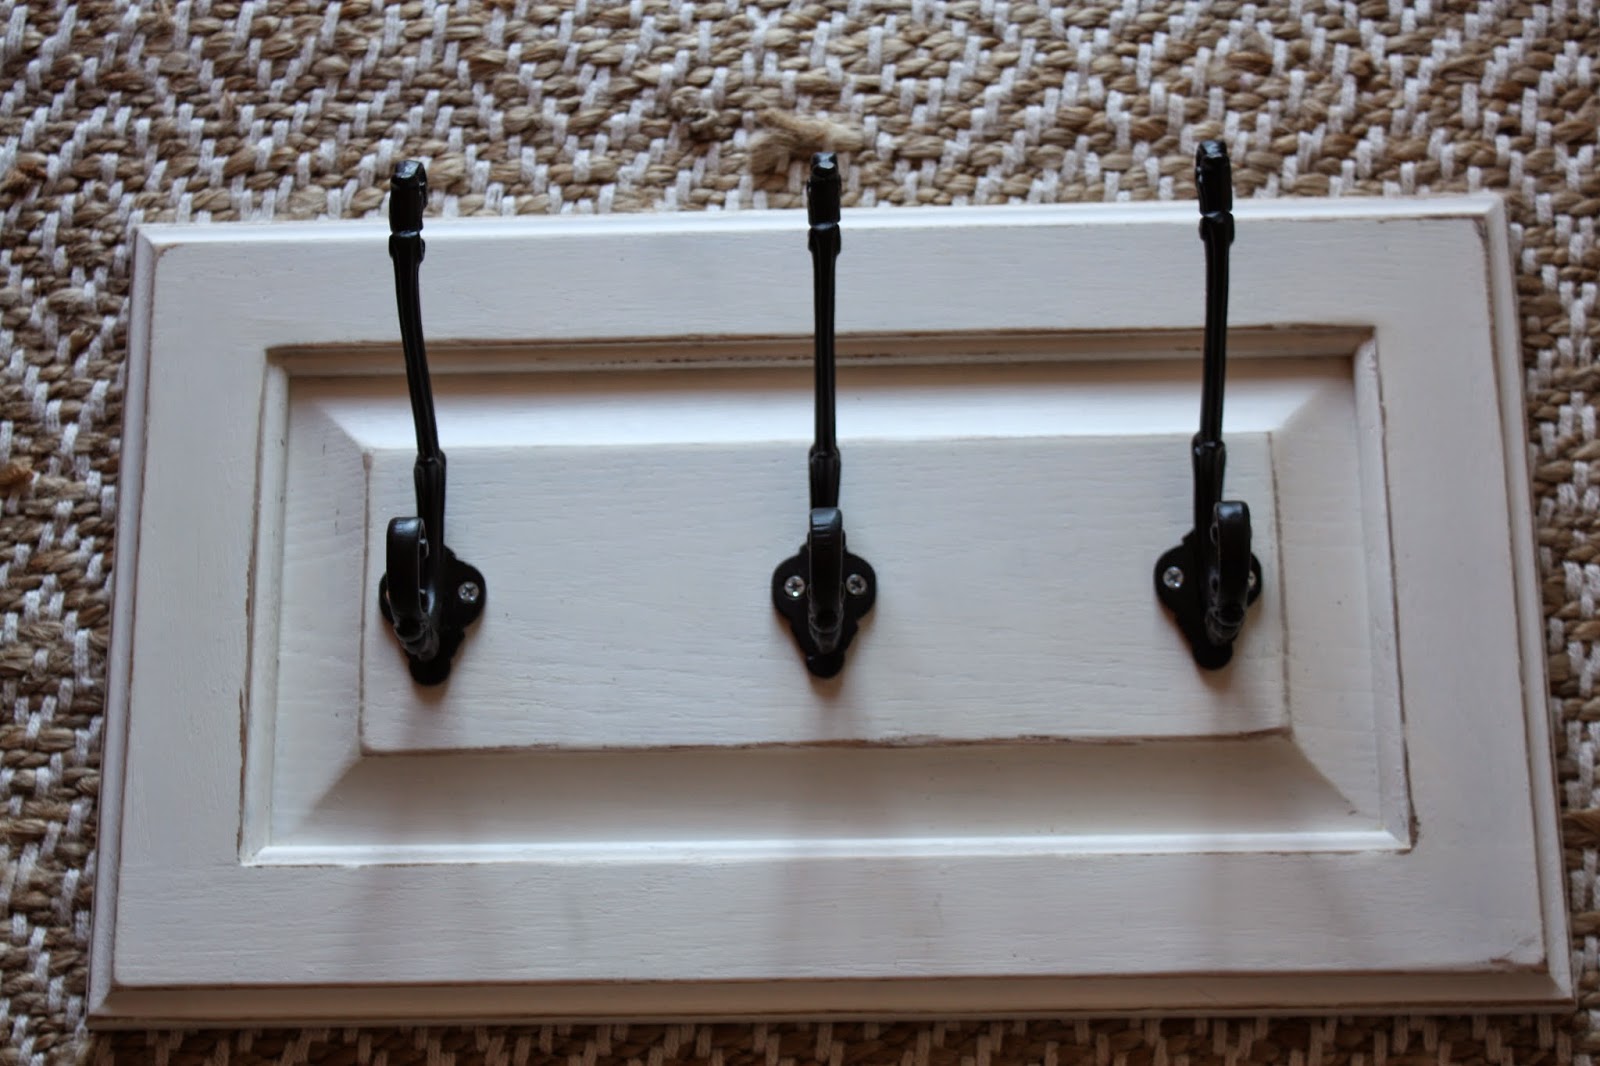
I added a couple of hooks to the back. It's so much easier to add them now before attaching the coat hooks.

I purchased these 3 coat hooks at Hobby Lobby for $3.00 each. I always check their ad and buy hooks, handles, and knobs when they have them 50% off (which I think is about every other week). They also usually have a great selection!

The one disadvantage with Hobby Lobby's hooks, handles, and knobs is that most do not come with hardware. These three hooks did not come with screws so and I rounded up a few that would fit. And of course they were silver in color. 
It's a quick fix though! I pulled out my black acrylic paint and quickly dabbed it on the screw heads. This is a little trick that works great every time. I have also used a black sharpie and it works too! It doesn't cover as well as the paint but will work in a pinch (especially when you don't have any black paint on hand) !

From Cabinet Door to Coat Rack! I love it! It found a home in the foyer just inside the front door next to my faux repurposed pallet gate (I'll be sharing the DIY on that later on). The keys I found at Marshall's sometime back and they look quite perfect hanging from one of the hooks!


And of course, it needed a little scarf too!

In case you haven't already done the math, I spent a total of $14 on this jewel. The next time you're out thrifting or antiquing, look for a cabinet door or two!
Happy Tuesday! Thanks for spending some time with me today!
P.S. I apologize for some of the not so great pictures! The weather has been pretty crummy here and getting good natural light has been almost impossible!
No comments:
Post a Comment