Faux Mercury Glass
Transformation Tuesday - Post #8
First up.... let me just say I am so sorry if you were looking for a Transformation Tuesday post last week. I promise you... I have a great reason! Mr. LAHWJ hurt his back while working in Afghanistan and came home unexpectedly last Wednesday. It put quite a kink in my plans for last week so I had to squeeze a lot into Monday and Tuesday. Thankfully, he's doing okay (and I am so happy that he's home) but I see a lot of doctor visits in our near future! I am also playing chauffeur.... Oh, but just wait until he gets my bill for chauffeur services. Lol!
I love mercury glass and if you've been in Homegoods, TJ Maxx, or Marshal's lately you'll find tons of mercury glass vases, candleholders, etc. lining their shelves for the holidays. Most also come with a hefty price tag! This week I thought I'd share a quick and easy tutorial showing how to create your own faux mercury glass.
Here are the supplies that you'll need:
Painter's tape
Mirror Image (Rustoleum) or Looking Glass (Krylon) spray paint
Gold Metallic spray paint
Glass Vases, Candleholders, etc
Spray bottle (mixture of 1/2 water and1/2 vinegar)
Paper towels (or rag)
Step 1: Make sure your vases, candleholders, containers are clean. I had several of these stashed in the attic and a few I picked up at the dollar store.
Step 2: Tape off the outside of the container using painters tape and scrap paper. (The Mr. complains that I save everything but sometimes it pays off.)
Step 3: Spray the inside of the container with the water/vinegar mixture.
Step 4: Spray a few quick light squirts of the mirror image paint all around the inside of the container. Pour off any extra water using the paper towels or rag.
Step 5: Allow to dry a minute or two and repeat steps 3 and 4 until you reach the desired effect. I sprayed these vases, etc. with three coats. I didn't want the glass to be completely covered. I really like just a hint of the mirror image.
Step 6: Finally, spray the container with the water/vinegar mixture and a few light squirts of the gold paint. This will leave just a slight hint of the gold. If you prefer more of a gold look, spray a few coats of the gold paint before using the mirror image spray.
Step7: Allow to dry completely. Remove the tape and paper.
All done!
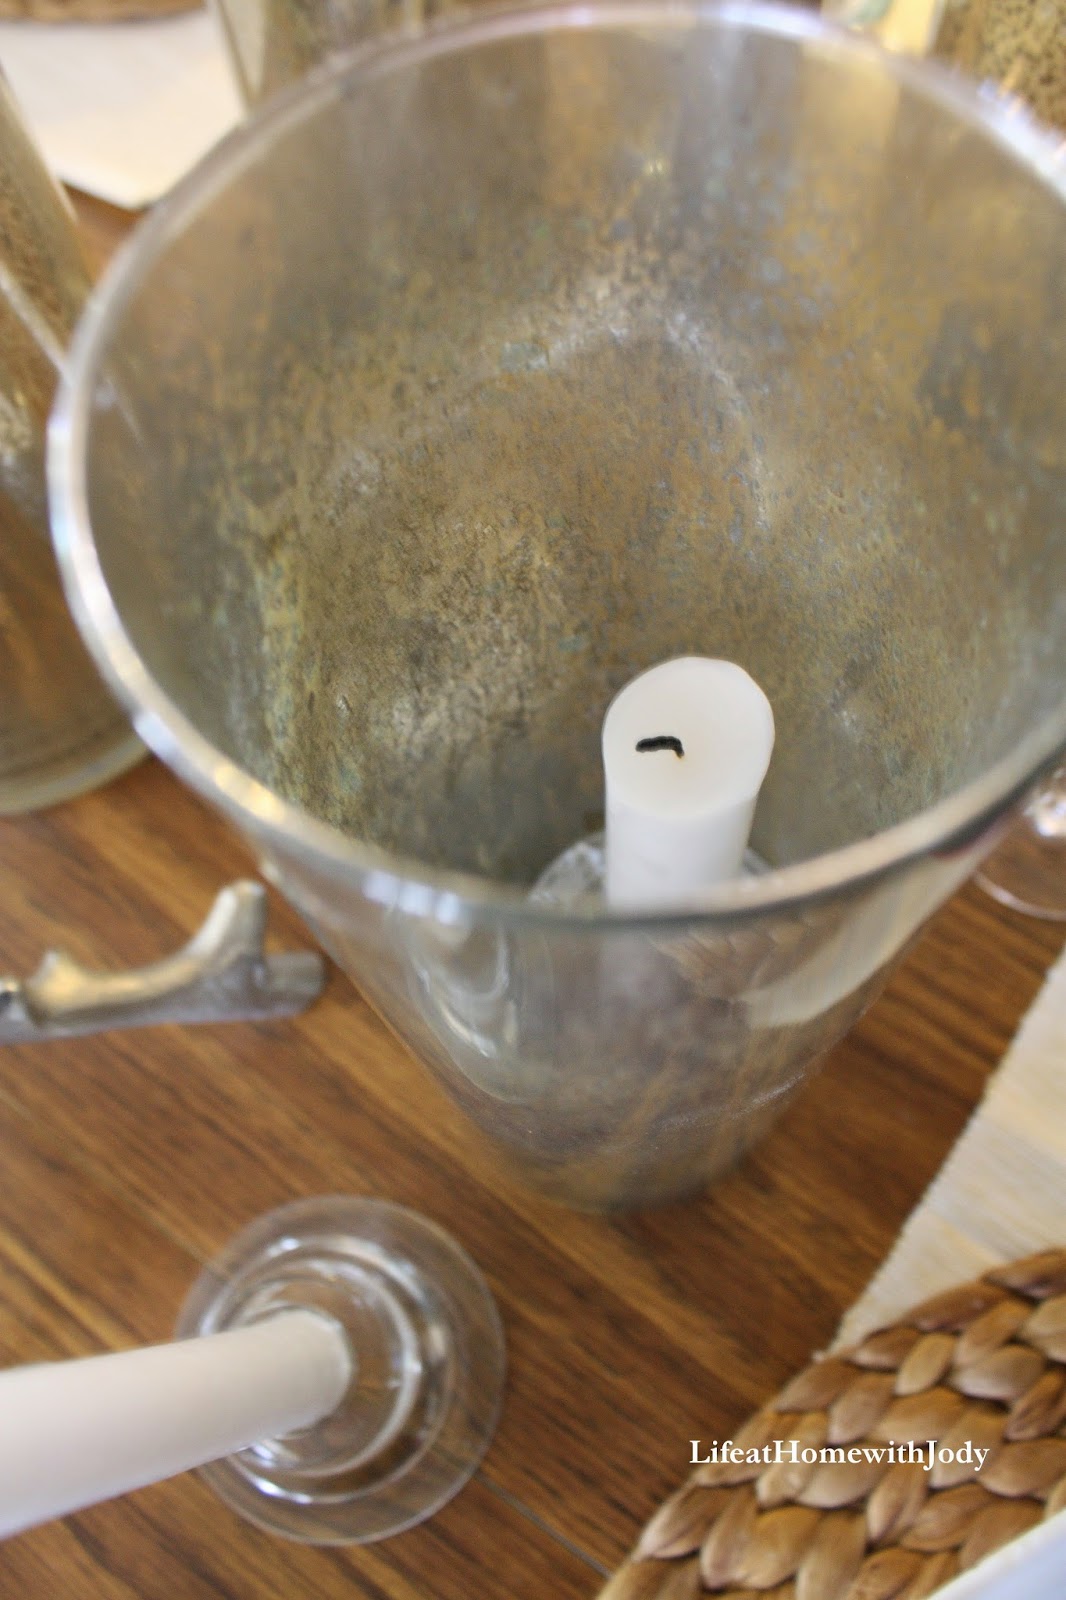
I love the mix of silver and gold. The gold is very muted and adds a nice touch to the primarily silvery Christmas thing I've got going on.
I added several of them with a mixture of other candleholders to our dining table as a centerpiece. They are beautiful lit up at night! I love the mix of the silver antler candleholders, the large mercury glass cylinders, small votive holders, and glass tapered candle holders.
I will also share with you a little strategy that I use to keep from buying those expensive tall candles. I turn a small candle holder upside down inside the larger cylinder and use a smaller candle. It's the perfect height. I also used tapered candles inside a few of the cylinders. You could also fill the cylinders with Epsom salt.
And here's one more picture of the faux mercury glass pieces being used as a vase. I love how it looks next to the mercury glass lamp on our nightstand.
It's perfection in my book and I love the money I saved doing it myself!
Happy Tuesday!
Jody


%2Bof%2BIMG_7084.JPG)


%2Bof%2BIMG_7130.JPG)
%2Bof%2BIMG_7074.JPG)
%2Bof%2BIMG_7078.JPG)
%2Bof%2BIMG_7081.JPG)
%2Bof%2BIMG_7082.JPG)